 I’m hosting a free GIVEAWAY video series on how to make three different types of valances. Easy online video series with step-by-step instructions! Winner announced October 29th! Good luck!
Swag Window Treatment
This is an EASY swag window treatments idea! I came up with this simple pattern a few years ago, and my clients love them! If you can sew a straight line, thread a needle, use a staple gun and drill, then you can make this curtain!
If you are looking for beginning sewing projects, this pattern will be a great one to start with! It isn’t overcomplicated! But get ready, once your friends and family see it, you may be getting drapery orders!
Note:
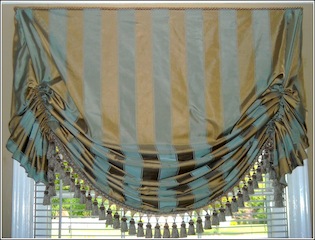
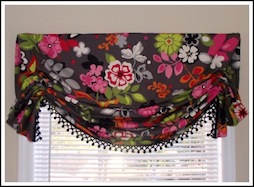
In this tutorial we are going to be using a fun fabric for a young girl’s room. I will be using the same pattern idea as the first swag window treatment pictured at the top, EXCEPT it was made with 1 1/4 yards of fabric.
The reason I used less fabric is because the flowery fabric was a little thicker, and I did not want the curtain to be as full or as long as the stripe swag treatment pictured.
If you are wanting the more formal and fuller swag like the first swag pictured, then choose a fabric that seems to drape well and be sure to use 1 1/2 yards.
So, keep that in mind when making your choices. It is amazing how a different choice of fabric can give you two similar, but yet different looks.
Supplies Needed:
1 1/4 to 1 1/2 yards of designer fabric
(add 1/8 of a yard if you want to cover the top of your boards)
1 1/4 to 1 1/2 yards of lining
1 1/2 yards of trim
staple gun
yardstick
1×4 board
glue gun
” L ” shape brackets
drill
Step 1
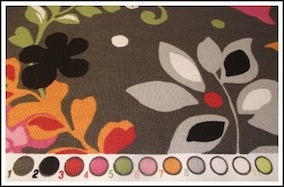
Trim the edging off both sides of your drapery fabric. Tip: The colors that are in little circles on the edging tell you the exact colors that are in the drapery fabric. This is a wonderful way to match other fabrics as well as paint colors.
Next, lay your lining down right sides together, and then lay your designer fabric facing right-side down. After you have right-sides together pin all the way around. Be sure to make a small mark indicating the top of your curtain.
Step 2
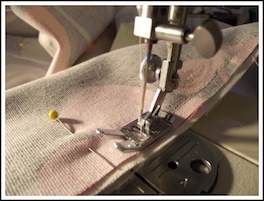
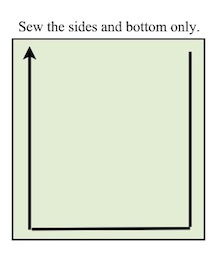
Now, just sew both sides and the bottom. Just let your zipper foot come close to the edge as shown and follow all the way around the three sides.
Turn your curtain ride side out, and make sure to use a pin to gently pull out the corners. Next, press your edges using a little spray starch.
Step 3
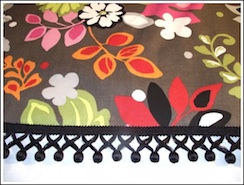
You are now ready to attach your trim at the bottom. You are going to do this BEFORE you begin gathering up the sides. I use a glue gun to attach my trim because I do not want any stitching to show on the back.
Step 4
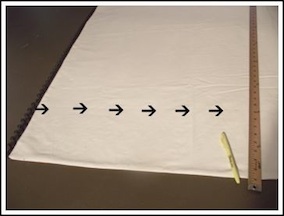
After you’re finished attaching your trim, turn your fabric over. Tip: another trick I use to make sure there are no wrinkles in the curtain, is to take a yard stick and run it across the fabric until it is smooth.
Next, you are going to mark where you will be hand sewing in order to form the gathers. I know I said hand sewing, but it won’t be a big deal. On each side of your swag window treatment measure 8″ down from the top. Mark a small dot with a yellow highlighter. Then measure 8″ from the edge and make a tiny mark. Do this all the way down. Once completed take your yardstick and match all the markings and draw a straight line until you reach your original mark.
So, just to be clear, you will have a straight line following up your curtain which will be 8″ from the edge. Your line will stop 8″ from the top edge.
Step 5
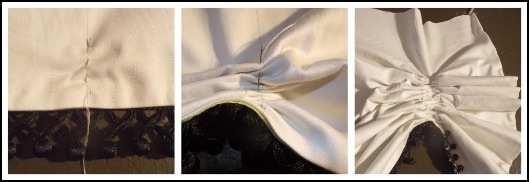
You are ready to hand sew the gathers. You will want to double your thread for strength. Start at the bottom and push your needle through both pieces of fabric. Take your needle in and out at about an 1″ to an 1 1/2″. Do this about 4 times and then pull tight. Run your needle back through the gather, pull tight again, and then run them back through again, and repeat.
NOTE: You will need to re-thread your needle with new thread about three times on each side. This is best, as thread will become weaker with excess use. When you are getting close to the end of the thread, just whip stitch it in place several times. Re-thread your needle and start over in the same spot.
Step 6
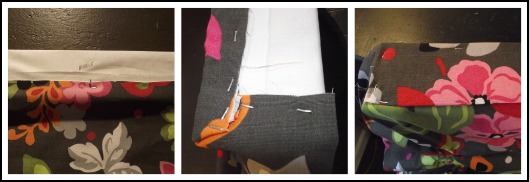
Measure your window and add an extra two inches to the final measurement for your board. (Home improvement stores will cut the boards for you for free if you don’t have a way to do it yourself.) Make sure to get the cheaper pine 1×4 boards!
Cover your board with your lining. Attach using the staple gun. Just pretend you are wrapping a present.
Put the staple side of the board facing up and mark the middle of the board. Next, take your ruler and measure 1″ from the edge of the board on three sides. Make a small mark indicating the middle of your curtain.
Place your board on the floor and attach the middle of the curtain to the board first. Staple all the way down following your inch marks.
When you are ready to come around the sides it is so much easier to work with if you place your curtain on a table.
Next cover the top of your board.
Step 7
You are now ready to hang your swag window treatments. I always like to hang above the window frame about 4″-6″ because it gives the illusion of a larger window!
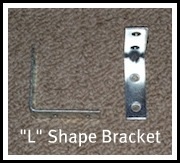
You want to put your “L” shape brackets right above the window along the outside edge, not going farther out than the window trim. Measure and mark evenly. Drill your “L” shape brackets into the wall first. You may need to use wall anchors.
Place your curtain on top of the ” L ” shape brackets making sure your curtain is centered and then drill your screws in.
Now your curtain is not complete until you attach the sides. I use my staple gun and put one staple into the curtain attaching to the wood frame.
After both sides are attached you will need to “fluff” the curtain and line up the swags. And that is it!
Making swag window treatments really isn’t that hard.
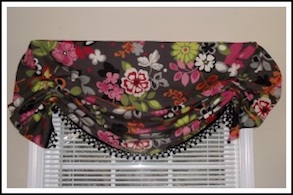
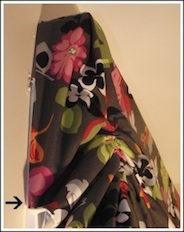

What a versatile custom curtain! Just a 1 1/2 of drapery fabric and an afternoon of sewing and you have some gorgeous swag window treatments!
Thanks for the instructions! My grandma always had swag curtains in her home, so I want to make some for her. Based off of your steps, they seem pretty easy to make. What should I use to mark the fabric?